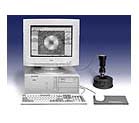
Brinell Scale Hardness Testing
Download
complete product literature for these testers at the page for that tester.
Also see links for Brinell
Scopes, Test Blocks,
and Brinell Accessories. (Accessories are listed under each product.)
______________________________________________________________
The Fundamentals of Brinell Testing
Widely
used on castings and forgings, the Brinell test method applies a predetermined
test force to a carbide ball of fixed diameter which is held for a predetermined
time and then removed. The diameter of the indentation width is measured
twice - usually at right angles to each other and averaged. A formula
or chart is then used to convert the averaged diameter measurements to
a Brinell hardness number.
Brinell calculation chart using a 10mm ball - Brinell
calculation chart using a 5mm ball
Test
forces usually range from 500 to 3000 kilograms (occasionally down to
1kg in less frequently used tests). Carbide* indenters are 10mm in diameter,
although there are less frequently used tests using light loads and smaller
diameter indenters (from 5mm to 1mm). Generally, the test load must be
held for 10 - 15 seconds although in practice shorter dwell times are
often used if it is known not to influence the test result. The Brinell
measurement is typically done to the nearest 0.05mm and occasionally 0.01mm
although using a standard
20X scope such a measurement is subject to operator influence.
*As of the latest revision (2000) of the ASTM Brinell standard E-10 the
indenter must be carbide.
There are limitations and conditions in the use of the Brinell test. The test surface may need to be prepared with a grinder to make the test area brighter so the impression is measurable able using the scope, to remove hardness surface effects from heat treating, or to smooth the surface to produce an even impression. Other conditions limit the use of a Brinell test: on materials that are too thin (less than ten times the depth of indentation); locations too close to the sample edge (less than 2-1/2 impression diameters); or too close to another indentation (less than 2-1/2 impression diameters). Other conditions require the direction of the load to be perpendicular to the test surface within 2 degrees. Curved surfaces should be at least 2-1/2 times the diameter of the ball diameter being used.
How Newage Testers Can Improve Your Brinell Testing
Brinell
testing often presents some challenges for users. Testing results are
usually heavily influenced by error in the operator's scope measurement.
Often the measurement results can be disputed between vendor and customer.
Also, the test
procedure can be lengthy and have a high labor cost especially in high
volume test applications. Sometimes the test specimens present special
problems of size or configuration. Newage testers provide answers to these
problems.


