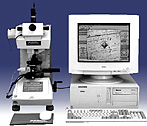
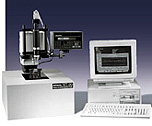
Microhardness Testing (Vickers & Knoop)
Download complete product literature for these testers: Select the link,
then "Download Literature".
Also see links for DataView, Test
Blocks, and Rockwell Accessories. (Accessories are listed under each
product.)
______________________________________________________________
The Fundamentals of Microhardness Scale Testing
The Microhardness test procedure ASTM E-384 specifies a range of light loads using a diamond indenter to make an indentation which is measured and converted to a hardness value. It is very useful for testing on a wide type of materials as long as test samples are carefully prepared. There are two types of indenters, a square base pyramid shaped diamond for testing in the Vickers scale and a narrow rhombus shaped indenter for the Knoop scale. Typically loads are very light, ranging from a few grams to one or several kilograms, although "Macro" Vickers loads can range up to 30 kg or more. The Microhardness methods are used to test on metals, ceramics, composites - almost any type of material.
Since the test indentation is very small, the Microhardness testing is useful for a variety of applications: testing very thin materials like foils or measuring the surface of a part, small parts or small areas, measuring individual microstructures, or measuring the depth of case hardening by sectioning a part and making a series of indentations to describe a profile of the change in hardness. The Vickers method is more commonly used. The Knoop method is commonly used when indentations are closely spaced or testing is close to the edge of a specimen due to the narrow shape of the indentation. The width of the Knoop indentation can provide more resolution for measurement and the indentation is also less deep so it is useful for thinner materials.
There are a number of considerations in Microhardness testing. Sample preparation is usually necessary in order to provide a specimen that can fit into the tester, make a sufficiently smooth surface to permit a regular indentation shape and good measurement, and be held perpendicular to the indenter. Usually the prepared samples are mounted in a plastic medium to facilitate the preparation and testing. The indentations should be as large as possible to maximize the measurement resolution. (Error is magnified as indentation sizes decrease) The test procedure is subject to problems of operator influence on the test results.
Also see the General Hardness Training Guide: Part 1 Part 2 Part 3
For a complete knowledge of the Microhardness testing users should obtain the ASTM standard E-384 which describes both Vickers and Knoop testing.
How Newage Testers Can Improve Your Microhardness Testing
Microhardness
testing often presents challenges for users. The test procedure is lengthy
and requires skilled personnel so it is expensive to perform. The test
result is subject to operator influence. Newage testers can provide answers
to these and other challenges in micro testing.


