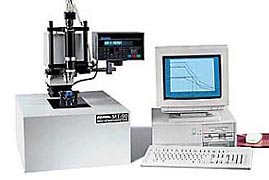

MT90
Automatic Case Depth Hardness Traverse System
A
Complete Case Depth in a Few Minutes. MT90
Microhardness Traverse System provides the fastest possible case depth analysis
using Rockwell-type depth measurement. Improve productivity ten times compared
to standard methods. Reduced sample preparation and operator influence. Used
by most major automotive and aerospace companies.
Download Product Literature
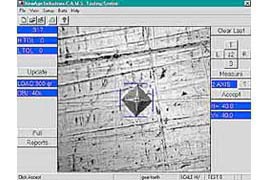
C.A.M.S.TM
Microhardness Tester Computer Add-on
Get a PC Upgrade Your Old or New Micro. C.A.M.S.
will retrofit almost all models of micro testers for less than buying new. CAMS
provides reduced operator influence with automatic or manual on-screen measurement.
It significantly improves productivity. Options available for total automation
with manual or motorized X/Y tables and automatic focus.
Download Product Literature
SHIMADZU
HMV-2 Advanced Vickers or Knoop Microhardness Tester
The HMV-2 uses touchpad screen controls, automatic turret, and automatic
load change features for easier operation. Applies loads from 10g to 2kg.
Download Product Literature
SHIMADZU HSV
Macro Vickers Tester
The HSV system provides the capability of Vickers testing at macro loads for
testing case hardened parts, welds, and a range of materials.
Download Product Literature
The Microhardness tester operation according
to ASTM E-384 specifies a range of loads using a diamond indenter
to make an indentation which is measured and converted to a hardness value.
It is very useful for testing
on a wide type of materials as long as test samples are carefully prepared.
There are two types of indenters,
a square base pyramid shaped diamond for testing in a Vickers tester and
a narrow rhombus shaped
indenter for a Knoop tester. Typically loads are very light, ranging from
a few grams to one or several
kilograms, although "Macro" Vickers loads can range up to 30 kg
or more. The Micro-hardness methods
are used to test on metals, ceramics, composites - almost any type of material.
Since the test indentation is very small,
the Microhardness testing is useful for a variety of applications:
testing very thin materials like foils or measuring the surface of a part,
small parts or small areas,
measuring individual microstructures, or measuring the depth of case hardening
by sectioning a part
and making a series of indentations to describe a profile of the change
in hardness. The Vickers
method is more commonly used. The Knoop method is commonly used when indentations
are
closely spaced or testing is close to the edge of a specimen due to the
narrow shape of the
indentation. The width of the Knoop indentation can provide more resolution
for measurement and the
indentation is also less deep so it is useful for thinner materials.

There are a number of considerations in Microhardness testing.
Sample preparation is usually
necessary in order to provide a specimen that can fit into the tester, make
a sufficiently smooth
surface to permit a regular indentation shape and good measurement, and be
held perpendicular to
the indenter. Usually the prepared samples are mounted in a plastic medium
to facilitate the
preparation and testing. The indentations should be as large as possible to
maximize the
measurement resolution. (Error is magnified as indentation sizes decrease)
The test procedure is
subject to problems of operator influence on the test results.