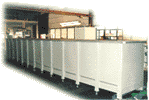
| Precision inspection machines for C-scan imaging, evaluation and documentation of flaw indications in extruded billets. |  |
PRODUCT DESCRIPTION |
| Introducing the LS-200B Series
LS-200B Series machines are intended for precision immersion inspection of extruded bars and billets. A dual-servodrive, non-slip parts rotator (W-axis) accommodates bars and billets with lengths to 9000mm (360in) and diameters to 430mm (17in), offering optimal ultrasonic inspection flexibility in single and multiple channel configurations. |
| Suitable test parts
Extruded bar and billets with diameters from 100mm (4") to 430mm (17") and lengths from 200mm (8") to 9000mm (30ft). |
| Inspection technique
C-scan immersion inspection with water paths to 250mm (10in). Single and multiple zone inspection capabilities. Longitudinal and shear wave inspection. |
| Inspection (feed) rates
Standard surface inspection speeds to 230 (9in/sec), dependent on operator-selected PRF and inspection resolution. |
| Surface coverage
100% coverage of cylindrical surfaces - using single or multi-transducer manipulator. |
| Flaw detection
0.4mm diameter (No.1) flat-bottomed hole (FBH), from 1.5mm (0.060") to 150mm 6" depth, dependent on material and transducer frequency. |
| Inspection tank
Beam-supported stainless steel tank with floor levelers and anti-vibration pads. Machined and leveled mounting pads for parts rotators located along the length of the floor of the tank. |
| Parts rotator
The W-axis parts rotator includes one pair each of drive and idler rolls. Drive rolls are dual servo with zero backlash gear reduction for precise rotary positioning of bars. Axial positioning of idler rolls is 'drop-in' adjustable for optimal positioning of the drive-to-driven rolls distance in the presence of part bowing. |
| Calibration bar rolls
Optional drive rolls for independent inspection of calibration bars up to 1500mm (48") long. |
| Water conditioning
Single or dual water recirculation and filtering systems with surface skimmers. Optional water heaters with temperature control to ± 2deg C (±4deg F). |
| Scanning robot
LS-200-design Z-axis vertical column and Y-axis horizontal boom mounted on a rugged self-supporting steel gantry structure (X-axis). X-axis is independently leveled parallel to the part rolls over the total length of the tank. |
| Transducer manipulators Robot supports both RESOLVE Series single-transducer manipulators and special single or-multiple transducer manipulators with mechanical part tracking mechanisms. Combined longitudinal and shear wave inspection or simultaneous multi-zone inspection. |
| Ultrasonic hardware Multi-channel upi-50 rack-mount ultrasonic instrument with built-in Pentium CPU. One to eight channels. Includes one RPP2 programmable square-wave pulser preamplifier for each active channel. Remote installation of the pulser preamplifiers on the scanning robot ensures enhanced ultrasonic signal-to-noise in the most difficult inspection environments. Total equivalent input noise less than 4nv |
| Motion control MAC servo drive hardware, with encoder feedback, RF noise suppression circuitry, and ScanMaster motion control software, for precise, repeatable positioning of all axes. Motion control hardware and system electrical panel installed in air-conditioned environment-proof control cabinet. |
| Operator control console Single-screen interface for ultrasonics and motion control, with keyboard, mouse or remote pendant control. Precise positioning of part and robot axes using the interactive ScanMaster 'virtual' control panel. Control console in stationary closed cabinet or wheeled table-top configuration. Optional second console expands full system control to two independent locations. |
| UT set-up and storage Unlimited hard-disk storage of ultrasonic set-up files. TEACH-IN interface with ScanMaster scan plan tools for operator-selected single or multi-segment scans. |
| Inspection resolution Inspection resolution operator-selected from 0.05deg (W-axis), in 0.01deg increments. |
| Data acquisition ScanMaster C-scan imaging software with simultaneous screen display up to four C-scan images and a toggle-selected A-scan signal. Rescan of selected surface areas of any size, 'SMART' full A-scan signal capture, 'Stop-on-Defect' alarming with 'AutoRepeat' noise screening, 'AutoDetect' detection of invalid pixels and loss-of-signal, and precise LOCATE cursor for validating indications. Automatic 'Annotate' for labeling of indications on real-time C-scan images. |
| Data evaluation and processing ScanMaster field-tested defect classifiers, including area-amplitude and signal-to-noise algorithms. |
| Report Generator Customized reporting format designed to customer specifications. Display of data and parameter fields, such as ultrasonic set-up files, captured and stored A-scan records, spectral content of probes (FFT), and lists of flaws detected according to ScanMaster classifiers. Inspection reports produced automatically or on demand. |
| Remote Communication LAN communication with a host computer or remote data processing station, providing maximum flexibility for the automation of inspection and data analysis procedures. |
| System access control Five levels of programmable authorized access. |
| Safety Standards and Approvals The LS-200B systems are fully compliant with the most stringent safety standards. The LS-200B systems are CE certified for safety and electro-magnetic compliance. |
PERFORMANCE ENVELOPE |
